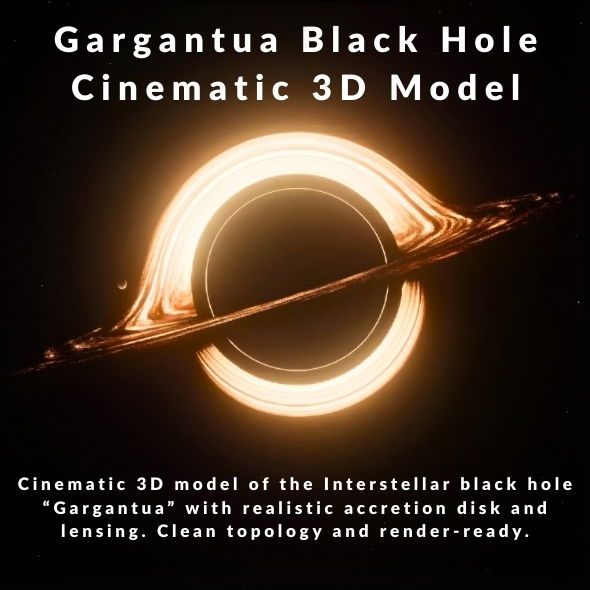
Understanding the Gargantua Black Hole Workflow
Working with the Interstellar Gargantua Black Hole 3D Model requires understanding how to leverage its shader-based accretion disk and gravitational lensing effects effectively. This guide covers the complete workflow from import to final render, ensuring you achieve stunning results in your projects.
Importing and Setup
Blender Import
For Blender users, the native .blend file includes:
- Complete shader graph for accretion disk and gravitational lensing
- Annotated nodes for easy customization
- Optimized geometry with clean topology
- Pre-configured Cycles render settings
Other Software Import
For other 3D applications:
- Import FBX, OBJ, STL, ABC, or DAE files for geometry
- Note that shader-based effects are Blender Cycles specific
- Recreate materials using your software’s node system
- Use the geometry as a base for custom shader development
Shader Graph Customization
Accretion Disk Setup
The accretion disk shader can be customized:
- Colors: Adjust the color and gradient of the accretion disk
- Size: Modify the radial extent and thickness
- Brightness: Control overall intensity and emission strength
- Rotation: Animate rotation for dynamic effects
Gravitational Lensing Configuration
To customize gravitational lensing effects:
- Adjust distortion intensity nodes
- Control the radius of the event horizon effect
- Modify light bending parameters
- Test different camera angles for optimal effect
Starfield Background
Customize the starfield:
- Adjust star density for different background looks
- Modify color tint to match your scene
- Control brightness and distribution
- Animate for dynamic backgrounds
Lighting Setup
Scene Lighting
For realistic black hole visualization:
- Use subtle directional lighting to enhance the accretion disk
- Avoid strong lights that overpower the emission effects
- Consider rim lighting to define the event horizon
- Test with different lighting setups for desired mood
Emission and Glow
The accretion disk uses emission shaders:
- Adjust emission strength in shader nodes
- Use post-processing glow effects for enhanced appearance
- Balance emission with scene lighting
- Test render settings for optimal glow appearance
Rendering Tips
Blender Cycles Settings
For best results in Blender Cycles:
- Use Cycles renderer (required for shader effects)
- Adjust sampling settings for quality vs. speed balance
- Enable denoising for cleaner renders
- Use appropriate light paths for emission materials
- Test with different sample counts for optimal quality
Performance Optimization
To balance quality and render time:
- Adjust sampling settings based on final output resolution
- Use denoising to reduce required samples
- Optimize shader complexity if needed
- Render in passes for compositing flexibility
- Use progressive rendering for preview renders
Animation Workflows
Accretion Disk Animation
For animated sequences:
- Animate accretion disk rotation for dynamic effects
- Use shader node animation for color changes
- Keyframe brightness and intensity parameters
- Create slow rotation for subtle motion
Camera Movement
Effective camera techniques:
- Use slow camera movements around the black hole
- Experiment with different angles to showcase lensing
- Consider orbital camera paths for cinematic shots
- Use depth of field to enhance depth perception
Post-Processing and Compositing
Color Grading
Enhance your renders in post:
- Adjust contrast to enhance the event horizon
- Use color grading to match your project’s aesthetic
- Enhance emission glow in compositing if needed
- Add subtle lens effects for realism
Glow and Lens Effects
To enhance black hole appearance:
- Add glow effects to the accretion disk in compositing
- Use lens flares for light interactions
- Enhance gravitational lensing distortion in post if needed
- Add subtle chromatic aberration for realism
Common Challenges and Solutions
Shader Effects Not Visible
If shader effects don’t appear:
- Ensure you’re using Blender Cycles renderer
- Check that shader nodes are properly connected
- Verify material assignment to the geometry
- Test with different camera angles
Performance Issues
If rendering is slow:
- Reduce sampling settings for preview renders
- Use denoising to allow lower sample counts
- Optimize shader complexity if needed
- Render at lower resolution for previews
Resources and Support
Get started with the Interstellar Gargantua Black Hole 3D Model by visiting our product page. Watch the preview video and download the model in your preferred format.
You can purchase the model directly on 3D Ocean or explore our complete 3D Models collection.
Conclusion
Mastering the workflow for the Interstellar Gargantua Black Hole 3D Model opens up endless possibilities for cinematic rendering, scientific visualization, space CGI, and VFX projects. By understanding shader customization, accretion disk setup, gravitational lensing configuration, and rendering optimization, you can create stunning black hole visualizations that captivate audiences and enhance your creative projects.