Author: gipegimiso9993

  • Creating Stunning Earth Visualizations: 21K Textures and Atmospheric Effects Workflow

    Creating Stunning Earth Visualizations: 21K Textures and Atmospheric Effects Workflow

    Understanding the 21K Texture Workflow

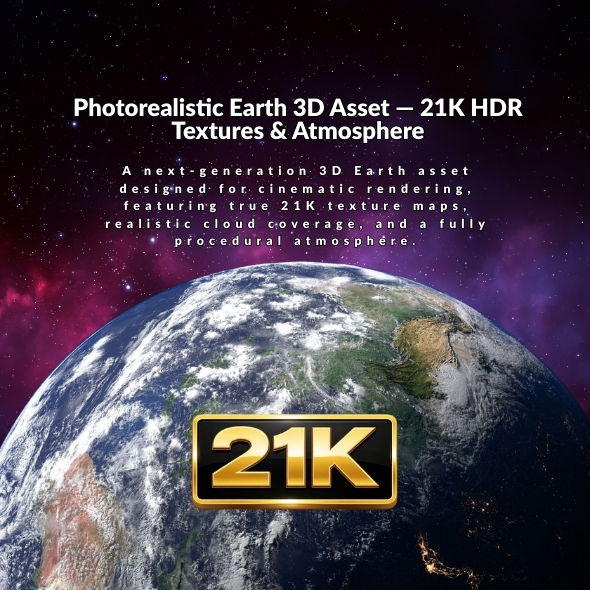
    Working with the Ultra-Realistic 3D Earth Model requires understanding how to leverage its 21K textures and atmospheric effects effectively. This guide covers the complete workflow from import to final render, ensuring you achieve stunning results in your projects.

    Importing and Setup

    Blender Import

    For Blender users, the native .blend file includes:

    • Full shading setup with all materials
    • Organized collections for Earth, clouds, and atmosphere
    • Clear naming conventions for easy navigation
    • Optimized scene structure

    Other Software Import

    For Cinema 4D, Maya, 3ds Max, or other software:

    • Import FBX or OBJ files
    • Ensure texture paths are correctly linked
    • Set up materials using the texture maps provided
    • Configure atmosphere layers if supported

    Material and Texture Setup

    Earth Surface Material

    The Earth surface uses 21K albedo textures:

    • Base Color: Load the albedo texture for surface color
    • Displacement: Use the displacement map for surface detail
    • Normal/Bump: Enhance surface detail with normal maps if available
    • Roughness: Adjust based on land vs. water areas

    Cloud Layer Material

    For the cloud coverage layer:

    • Use semi-transparent materials for realistic cloud appearance
    • Apply cloud texture maps to opacity and color channels
    • Adjust cloud density and coverage to match your scene
    • Enable volumetric effects if your renderer supports it

    Night Lights Setup

    For city night lights:

    • Use emission shader or glow effect for night lights
    • Adjust emission intensity based on camera distance
    • Combine with night lights texture map
    • Control visibility based on day/night cycles

    Atmospheric Effects Configuration

    Atmosphere Mesh Setup

    The dedicated atmosphere mesh provides realistic horizon glow:

    • Position the atmosphere mesh around the Earth
    • Configure scattering settings for realistic light behavior
    • Adjust atmosphere thickness for desired glow intensity
    • Enable volumetric scattering if available

    Horizon Glow

    To achieve realistic horizon glow:

    • Use the atmosphere mesh’s material properties
    • Enable emission or volumetric scattering
    • Adjust color and intensity to match real atmospheric glow
    • Test with different camera angles for optimal effect

    Lighting Techniques

    Sun Lighting Setup

    For realistic Earth lighting:

    • Use a single strong sun light source
    • Position the sun to create realistic day/night terminator
    • Adjust sun intensity based on desired exposure
    • Use area lights or HDRI for additional fill lighting

    Day/Night Cycles

    Creating day and night transitions:

    • Animate sun position for day/night cycles
    • Adjust night lights emission based on sun position
    • Control cloud visibility and color for different times
    • Use color grading to enhance day/night atmosphere

    Space Lighting

    For space scenes:

    • Use minimal ambient lighting to maintain space darkness
    • Emphasize the sun’s direct illumination
    • Add subtle rim lighting to separate Earth from space
    • Consider starfield backgrounds for context

    Camera and Composition

    Orbital Shots

    For orbital camera movements:

    • Use wide focal lengths (24-35mm) for context
    • Animate camera in circular orbits around Earth
    • Maintain consistent distance for smooth motion
    • Consider camera shake for handheld documentary style

    Close-Up Renders

    For detailed surface shots:

    • Use longer focal lengths (50-85mm) to avoid distortion
    • Focus on specific regions to showcase texture detail
    • Enable depth of field for selective focus
    • Use appropriate subdivision levels for close-ups

    Slow Rotations

    For rotating Earth shots:

    • Animate Earth rotation smoothly (360 degrees over 10-20 seconds)
    • Keep camera stationary or add subtle parallax
    • Ensure consistent lighting throughout rotation
    • Test animation timing for natural movement

    Rendering Settings

    Blender Cycles

    For Cycles rendering:

    • Set samples to 256-512 for final renders
    • Enable Denoising for cleaner results
    • Use Filmic color management for realistic colors
    • Enable Caustics for realistic light behavior
    • Adjust Light Tree for optimal sampling

    Performance Optimization

    To balance quality and render time:

    • Use Simplify enabled during viewport work
    • Increase subdivision only for final renders
    • Lower texture resolution for distant shots
    • Use adaptive sampling for efficient rendering
    • Render in passes for compositing flexibility

    Post-Processing and Compositing

    Color Grading

    Enhance your renders in post:

    • Adjust contrast and brightness for cinematic look
    • Use color grading to match your project’s aesthetic
    • Enhance atmospheric glow in post if needed
    • Add subtle lens effects for realism

    Atmosphere Enhancement

    To enhance atmospheric effects:

    • Add glow effects to horizon in compositing
    • Use color correction for day/night transitions
    • Enhance cloud contrast and detail
    • Add subtle lens flares for sun interactions

    Common Challenges and Solutions

    Texture Resolution

    If textures appear blurry:

    • Verify texture paths are correctly linked
    • Check that 21K textures are actually loaded
    • Increase texture interpolation settings
    • Ensure appropriate subdivision levels

    Atmosphere Not Visible

    If atmospheric effects don’t appear:

    • Check that atmosphere mesh is enabled and visible
    • Verify material settings for emission/scattering
    • Adjust camera angle to see horizon glow
    • Test with different render settings

    Performance Issues

    If viewport is slow:

    • Enable Simplify in Render settings
    • Reduce viewport subdivision levels
    • Lower texture resolution for viewport
    • Hide atmosphere or clouds during setup

    Advanced Techniques

    Multi-Pass Rendering

    Render in passes for maximum control:

    • Separate Earth, clouds, and atmosphere passes
    • Render shadow and reflection passes separately
    • Composite in post for flexible adjustments
    • Add depth passes for depth-of-field effects

    Animation Workflows

    For animated sequences:

    • Pre-render texture variations for efficiency
    • Use proxy objects during animation preview
    • Render at lower resolution for previews
    • Optimize keyframe spacing for smooth motion

    Resources and Support

    Get started with the Ultra-Realistic 3D Earth Model by visiting our product page. Watch the preview video and download the model in your preferred format.

    You can purchase the model directly on 3D Ocean or explore our complete 3D Models collection.

    Conclusion

    Mastering the workflow for the Ultra-Realistic 3D Earth Model opens up endless possibilities for cinematic rendering, scientific visualization, and space-themed motion graphics. By understanding texture setup, atmospheric effects, lighting techniques, and rendering optimization, you can create stunning Earth visualizations that captivate audiences and enhance your creative projects.

  • Ultra-Realistic 3D Earth Model with 21K Textures: Complete Guide for Cinematic Rendering

    Ultra-Realistic 3D Earth Model with 21K Textures: Complete Guide for Cinematic Rendering

    Introduction to Ultra-Realistic 3D Earth Model

    The Ultra-Realistic 3D Earth Model with 21K Textures represents the pinnacle of planetary 3D modeling. Designed for cinematic rendering, scientific visualization, and space-themed motion graphics, this high-quality asset features unprecedented detail with 21K source textures, realistic cloud coverage, accurate city night lights, and a dedicated atmosphere mesh for physical-looking horizon glow.

    Why Choose This 3D Earth Model?

    This ultra-realistic Earth model offers numerous advantages for 3D artists, filmmakers, and scientists:

    • 21K Ultra-High Resolution Textures: Maximum surface detail for close-up renders and orbital shots
    • Realistic Atmospheric Effects: Dedicated atmosphere mesh with horizon glow and scattering effects
    • Dynamic Cloud Coverage: Realistic cloud layers that enhance the visual authenticity
    • City Night Lights: Accurate representation of urban lighting from space
    • Cinematic Quality: Optimized for 4K and 8K workflows
    • Professional Use: Perfect for documentaries, scientific visualization, and motion graphics

    Technical Specifications

    The Earth model features impressive technical details:

    • Textures: 21K resolution for albedo, clouds, displacement, and night lights
    • Atmosphere: Dedicated mesh with realistic horizon glow and day/night transitions
    • Clouds: Realistic cloud coverage layer
    • Night Lights: Accurate city night lights texture map
    • Geometry: High-resolution model with clean, subdivision-ready topology
    • Optimization: Responsive viewport performance with Simplify enabled

    Available Formats

    The Earth model is available in multiple formats:

    • Blender (.blend): Native scene with full shading setup
    • FBX: Universal format for most 3D applications
    • OBJ: Widely supported format
    • GLB: Optimized format for real-time applications

    Software Compatibility

    The native scene is created in Blender using Cycles renderer, but the geometry and textures work with:

    • Blender: Native format with full shading setup
    • Cinema 4D: Import via FBX or OBJ
    • Maya: Compatible via FBX import
    • 3ds Max: Works with FBX and OBJ formats
    • Unreal Engine: Import for real-time visualization
    • Unity: Suitable for game development and visualization
    • Houdini: Compatible via standard formats

    Use Cases

    Cinematic Rendering

    Perfect for space documentaries, title sequences, broadcast graphics, and trailers. The high-resolution textures ensure your Earth renders look photorealistic in demanding 4K and 8K workflows.

    Scientific Visualization

    Ideal for astronomy projects, planetarium content, and educational materials. The accurate representation of Earth’s surface, clouds, and night lights makes it perfect for scientific presentations.

    Motion Graphics

    Excellent for sci-fi cinematics, concept art, matte painting, and space-themed motion graphics. The atmospheric effects and realistic lighting create stunning visual effects.

    Fulldome Content

    Perfect for planetarium and fulldome displays. The spherical layout and high detail make it ideal for immersive experiences.

    Texture Maps and Materials

    The Earth model includes comprehensive texture maps:

    • Earth Surface (Albedo/Color): 21K resolution for maximum detail
    • Clouds Coverage: Realistic cloud layer texture
    • City Night Lights: Accurate urban lighting representation
    • Displacement/Height Map: For surface detail enhancement
    • Additional Maps: Roughness and specular maps where needed

    All textures are UV mapped and aligned to the same spherical layout, making it easy to edit or replace maps if required.

    Atmospheric Effects

    The dedicated atmosphere mesh provides:

    • Horizon Glow: Physical-looking horizon glow effect
    • Scattering: Realistic light scattering through the atmosphere
    • Day/Night Transitions: Accurate transitions between day and night
    • Realistic Lighting: Properly simulated atmospheric lighting

    Rendering Tips

    Blender Setup

    For best results in Blender:

    • Use Cycles renderer for realistic atmospheric effects
    • Enable Simplify in Render settings for responsive viewport
    • Increase Subdivision levels in Render settings for final renders
    • Adjust atmosphere settings for desired horizon glow intensity
    • Use appropriate lighting setups for day or night renders

    Performance Optimization

    For optimal performance:

    • Use Simplify enabled for viewport work
    • Increase subdivision only for final renders
    • Lower subdivision values on less powerful hardware
    • Adjust texture resolution based on camera distance
    • Use proxy objects for complex scenes

    Getting Started

    Ready to create stunning Earth visualizations? Visit our Ultra-Realistic 3D Earth Model page to view the live YouTube preview and download options.

    You can also purchase the model directly on 3D Ocean or browse our complete 3D Models collection.

    Conclusion

    The Ultra-Realistic 3D Earth Model with 21K Textures provides everything you need for cinematic rendering, scientific visualization, and space-themed motion graphics. With its exceptional detail, realistic atmospheric effects, and comprehensive texture maps, this model delivers the quality and realism required for professional projects and creative endeavors.

  • Ultra High-Detail 3D Printable Models: Best Practices for Mars Planet and Planetary Models

    Ultra High-Detail 3D Printable Models: Best Practices for Mars Planet and Planetary Models

    Understanding Ultra High-Detail 3D Printable Models

    Ultra high-detail 3D printable models, such as the Mars Planet model with 3.1 million triangles, require specific techniques and considerations to achieve optimal printing results. This guide covers best practices for working with high-resolution planetary and geometric models.

    Model Preparation

    File Format Selection

    Choose the right format for your workflow:

    • STL: Best for direct 3D printing, widely supported by slicers
    • GLB: Optimized format, good for web preview and some slicers
    • FBX: Useful if you need to modify the model before printing
    • BLENDER: Best for Blender users who want to customize before export

    Mesh Analysis

    Before printing, analyze your model:

    • Check for non-manifold edges or holes
    • Verify wall thickness meets your printer’s minimum requirements
    • Ensure the model is watertight (closed mesh)
    • Use mesh repair tools if needed (Netfabb, Meshmixer, or Blender)

    Slicing Strategies for High-Detail Models

    Layer Height Optimization

    For ultra high-detail models like Mars Planet:

    • Fine Detail: 0.1mm layer height for maximum detail capture
    • Balanced: 0.15mm for good detail with reasonable print time
    • Large Scale: 0.2mm acceptable for prints over 30cm
    • Avoid layer heights above 0.2mm to preserve surface detail

    Wall Thickness and Infill

    Optimize material usage while maintaining strength:

    • Wall Thickness: 2-3mm for structural integrity
    • Infill: 10-15% sufficient for hollow models
    • Top/Bottom Layers: 4-6 layers for smooth surfaces
    • Use gyroid or cubic infill for better internal structure

    Support Material Strategy

    For two-piece models like Mars Planet:

    • Print each hemisphere with minimal supports
    • Use tree supports for complex overhangs
    • Orient parts to minimize support needs
    • Consider printing with the equator as the base

    Material Selection

    Filament Types

    Choose the right material for your project:

    • PLA: Easy to print, good detail, suitable for displays
    • PETG: More durable, good for educational models
    • ABS: Strong but requires heated bed and enclosure
    • Resin (SLA): Maximum detail but smaller build volumes

    Color Considerations

    For planetary models:

    • Use red/orange filaments for Mars
    • Consider multi-color printing for realism
    • Post-processing painting can enhance detail
    • Primer helps paint adhere to printed surfaces

    Two-Piece Model Assembly

    Printing Strategy

    For models split into two parts:

    1. Print both hemispheres separately
    2. Ensure consistent scale for both parts
    3. Use same slicer settings for uniformity
    4. Allow adequate cooling time before assembly

    Assembly Techniques

    Join the two halves effectively:

    • Friction Fit: Use alignment features in the model
    • Adhesive: CA glue or epoxy for permanent bonds
    • Mechanical: Screws or pins for removable assembly
    • Sand the seam for invisible joins
    • Large-Scale Printing Tips

      Printer Setup

      Prepare your printer for large prints:

      • Level the bed meticulously
      • Ensure adequate bed adhesion (PEI, glass, or buildtak)
      • Use brim or raft for large base areas
      • Monitor first layers closely

      Print Monitoring

      For long print jobs:

      • Use OctoPrint or similar for remote monitoring
      • Check periodically for layer shifts or warping
      • Keep ambient temperature stable
      • Have backup filament ready

      Post-Processing Techniques

      Surface Finishing

      Enhance your printed Mars Planet model:

      • Sanding: Start with 220 grit, progress to 400+
      • Filling: Use filler primer for layer lines
      • Priming: Apply primer before painting
      • Painting: Use acrylic paints for color accuracy

      Detail Enhancement

      Bring out surface details:

      • Dry brushing highlights raised features
      • Washes emphasize recessed details
      • Weathering adds realism to planetary models
      • Clear coat protects finished models

      Hollow Model Optimization

      Benefits of Hollow Design

      The Mars Planet model’s hollow interior offers:

      • 40-60% material savings
      • Faster printing times
      • Reduced weight for large prints
      • Lower risk of warping

      Internal Structure

      Maintain strength with hollow models:

      • Ensure adequate wall thickness
      • Use strategic infill patterns
      • Add internal supports if needed
      • Consider drainage holes for resin prints

      Troubleshooting Common Issues

      Detail Loss

      If surface details are lost:

      • Reduce layer height to 0.1mm
      • Slow down print speed
      • Check nozzle condition (replace if worn)
      • Increase model scale

      Assembly Problems

      If parts don’t fit:

      • Check scale consistency between parts
      • Account for material shrinkage
      • Sand mating surfaces for better fit
      • Use heat to adjust fit if using PLA

      Advanced Techniques

      Multi-Material Printing

      For enhanced realism:

      • Use dual-extrusion for color variations
      • Print base and surface in different materials
      • Consider soluble supports for complex geometries

      Scale Variations

      Experiment with different scales:

      • Small (10-15cm): Quick prints, good for testing
      • Medium (20-30cm): Balanced detail and time
      • Large (40cm+): Maximum detail showcase

      Resources and Support

      Get started with the Mars Planet ultra high-detail printable model by visiting our product page. View the live Sketchfab preview and download in your preferred format.

      You can purchase the model directly on 3D Ocean or explore our complete 3D Models collection.

      Conclusion

      Working with ultra high-detail 3D printable models like the Mars Planet requires attention to slicing settings, material selection, and post-processing. By following these best practices, you can achieve stunning results that showcase the intricate details of planetary models and other high-resolution 3D prints.

  • Mars Planet 3D Printable Model: Complete Guide for Large-Scale Printing and Display

    Mars Planet 3D Printable Model: Complete Guide for Large-Scale Printing and Display

    Introduction to Mars Planet 3D Printable Model

    The Mars Planet 3D model is an ultra high-detail printable model designed for professional, educational, and display use. With 3.1 million triangles and 1.6 million vertices, this model captures the intricate surface details of the Red Planet, making it perfect for large-scale 3D printing projects.

    Why Choose This Mars Planet Model?

    This high-resolution Mars Planet 3D model offers several advantages for 3D printing enthusiasts and professionals:

    • Ultra High Detail: 3.1M triangles and 1.6M vertices ensure realistic surface detail
    • Two-Piece Design: Split design makes printing and assembly easier for larger scales
    • Hollow Interior: Optimized to save material while maintaining structural strength
    • Polar Optimization: Special care taken to preserve surface quality at the poles
    • Professional Quality: Ideal for educational displays, museums, and commercial projects

    Technical Specifications

    The Mars Planet model features impressive technical details:

    • Triangles: 3.1 million for ultra-high detail
    • Vertices: 1.6 million for smooth surface geometry
    • Design: Two perfectly insertable parts
    • Interior: Hollow design to optimize material usage
    • Topology: Optimized at polar areas for consistent detail
    • Geometry Only: No textures or materials included (geometry-focused model)

    Available Formats

    The Mars Planet model is available in multiple formats to suit different workflows:

    • BLENDER: Native format for Blender users
    • FBX: Universal format compatible with most 3D software
    • STL: Standard format for 3D printing slicers
    • GLB: Optimized format for web and real-time applications

    Best Practices for Large-Scale Printing

    Scale Considerations

    For best results, print the Mars Planet model at a large scale:

    • Recommended minimum scale: 15-20cm diameter
    • Large-scale prints (30cm+) showcase fine surface details best
    • Smaller prints may lose detail due to printer resolution limits
    • Consider your printer’s build volume when planning scale

    Two-Piece Assembly

    The model is designed in two perfectly insertable parts:

    • Print each hemisphere separately
    • Ensure proper orientation to minimize support material
    • Use alignment features for accurate assembly
    • Consider using adhesive or mechanical fasteners for permanent assembly

    Material Optimization

    The hollow interior design helps optimize material usage:

    • Reduces material consumption by 40-60% compared to solid models
    • Maintains structural integrity for large prints
    • Reduces printing time significantly
    • Allows for internal support structures if needed

    3D Printing Workflow

    Preparing the Model

    Before printing, prepare the Mars Planet model:

    1. Import the STL or GLB file into your slicer software
    2. Scale the model to your desired size
    3. Check for any geometry issues using mesh repair tools
    4. Verify wall thickness is appropriate for your printer

    Slicer Settings

    Recommended slicer settings for best results:

    • Layer Height: 0.1-0.2mm for fine detail
    • Wall Thickness: 2-3mm for structural strength
    • Infill: 10-15% (hollow interior reduces need for high infill)
    • Support: Minimal supports needed due to two-piece design
    • Print Speed: Moderate speed (40-60mm/s) for quality
    • Post-Processing

      After printing, enhance your Mars Planet model:

      • Remove support material carefully
      • Sand the seam where two halves meet
      • Apply primer for painting if desired
      • Consider adding a base or stand for display

      Use Cases

      Educational Displays

      Perfect for schools, museums, and educational institutions:

      • Planetary science education
      • Astronomy exhibits
      • Space exploration displays
      • Interactive learning tools

      Professional Presentations

      Ideal for commercial and professional use:

      • Space agency presentations
      • Planetary research visualization
      • Architectural and design projects
      • Marketing and promotional materials

      Software Compatibility

      The Mars Planet model works with various 3D software:

      • Blender: Direct import of BLENDER format
      • Cura: STL format for slicing
      • PrusaSlicer: STL format compatible
      • Maya/3ds Max: FBX format import
      • Web Applications: GLB format for real-time viewing

      Tips for Success

      • Print at large scale to showcase detail
      • Use high-quality filament for best surface finish
      • Consider multi-color printing for enhanced realism
      • Test print a small section first to verify settings
      • Use proper bed adhesion techniques for large prints

      Getting Started

      Ready to print your own Mars Planet model? Visit our Mars Planet 3D Model page to view the live Sketchfab preview and download the model in your preferred format.

      You can also purchase the model directly on 3D Ocean or browse our complete collection of 3D models.

      Conclusion

      The Mars Planet ultra high-detail printable 3D model provides everything you need for professional, educational, and display projects. With its two-piece design, hollow interior optimization, and exceptional detail, this model is perfect for large-scale 3D printing and educational displays.

  • How to Create Stunning Renders with iPhone 16 Pro 3D Models: PBR Workflow and Tips

    How to Create Stunning Renders with iPhone 16 Pro 3D Models: PBR Workflow and Tips

    Understanding PBR Workflow for iPhone 16 Pro Models

    Physically Based Rendering (PBR) is the industry standard for creating realistic materials in 3D. The iPhone 16 Pro Natural Titanium 3D models use a metallic-roughness PBR workflow, ensuring consistent and realistic results across different render engines.

    PBR Material Setup

    Metallic-Roughness Workflow

    The iPhone 16 Pro models use the metallic-roughness PBR workflow, which includes:

    • Albedo/Diffuse Map: Base color without lighting information
    • Metallic Map: Defines which areas are metallic (titanium) vs non-metallic
    • Roughness Map: Controls surface smoothness and reflection sharpness
    • Normal Map: Adds surface detail without increasing geometry

    Material Properties

    For the Natural Titanium finish:

    • Metallic Value: High (0.8-0.95) for titanium surfaces
    • Roughness Value: Low to medium (0.1-0.3) for polished titanium
    • Base Color: Neutral gray with slight warm tint
    • Reflection: Strong, but not mirror-like

    Cinema 4D Setup

    Using Physical Material

    In Cinema 4D, use the Physical material for best results:

    1. Create a new Physical material
    2. Load the Albedo texture into the Color channel
    3. Set the Metallic value based on the metallic map
    4. Load the Roughness map into the Roughness channel
    5. Add the Normal map to the Normal channel
    6. Adjust the Index of Refraction (IOR) for titanium (around 2.4)

    Redshift Material Setup

    For Redshift users in Cinema 4D:

    • Use the Redshift Material (RS Material)
    • Set Material Type to “Metal”
    • Load textures into appropriate channels
    • Enable Fresnel reflections for realistic results

    Blender Setup

    Principled BSDF Shader

    Blender’s Principled BSDF shader is perfect for PBR materials:

    1. Select the iPhone 16 Pro mesh
    2. In the Shader Editor, use Principled BSDF
    3. Connect the Albedo texture to Base Color
    4. Set Metallic to 0.9 (or use metallic map)
    5. Connect Roughness map to Roughness input
    6. Add Normal map to Normal input

    Material Settings

    Optimize your Blender material:

    • Enable “Use Nodes” in material properties
    • Set Material Output Surface to Principled BSDF
    • Use Image Texture nodes for all maps
    • Set Color Space to “sRGB” for color maps, “Non-Color” for data maps

    3ds Max Setup

    Physical Material Configuration

    In 3ds Max, use the Physical Material:

    1. Create a new Physical Material
    2. Set Material Type to “Metal”
    3. Load Albedo into Base Color
    4. Set Metallic to 1.0 (or use map)
    5. Load Roughness map into Roughness slot
    6. Add Normal map to Bump slot

    Lighting for Natural Titanium

    Studio Lighting

    For product shots, use a professional lighting setup:

    • Key Light: Soft area light at 45° angle
    • Fill Light: Softer light opposite key light
    • Rim Light: Backlight to separate from background
    • Reflection Cards: White cards to add controlled reflections

    HDRI Environment

    HDRI lighting provides realistic reflections:

    • Use high-quality HDRI environment maps
    • Rotate the HDRI to control reflection placement
    • Combine with area lights for additional control
    • Adjust HDRI intensity to balance with direct lights

    Camera and Composition

    Camera Settings

    Optimize your camera for product photography:

    • Use 50-85mm focal length for natural perspective
    • Enable depth of field for selective focus
    • Set aperture to f/2.8-f/5.6 for balanced depth
    • Position camera slightly above the iPhone

    Composition Guidelines

    • Follow rule of thirds for balanced layouts
    • Use negative space to emphasize the product
    • Consider multiple angles: front, back, side, detail
    • Maintain consistent lighting across all shots

    Rendering Settings

    Cinema 4D

    For Physical Renderer or Redshift:

    • Set samples to 128-256 for production
    • Enable Global Illumination
    • Use denoising for cleaner results
    • Render at 4K resolution for maximum detail

    Blender Cycles

    For Cycles rendering:

    • Set samples to 256-512
    • Enable Denoising in Render Properties
    • Use Filmic color management
    • Enable Caustics for realistic light behavior

    Post-Processing Tips

    Enhance your renders in post-production:

    • Adjust contrast and brightness subtly
    • Add slight color grading to match brand
    • Sharpen details without over-processing
    • Remove any minor artifacts or noise
    • Consider adding subtle lens effects

    Common Issues and Solutions

    Overly Reflective Surface

    If the titanium appears too mirror-like:

    • Increase roughness value slightly
    • Add subtle imperfections to the roughness map
    • Use environment maps with softer lighting

    Lack of Detail

    If the model appears flat:

    • Ensure normal maps are properly loaded
    • Check that normal map strength is appropriate
    • Add additional lighting to reveal surface detail

    Resources

    Get started with iPhone 16 Pro Natural Titanium 3D models by visiting our product page. View the live Sketchfab preview and download the models in your preferred format.

    Explore our complete 3D Models collection or browse on 3D Ocean.

    Conclusion

    Mastering the PBR workflow for iPhone 16 Pro 3D models enables you to create stunning, photorealistic renders. By understanding material setup, lighting techniques, and rendering best practices, you can produce professional-quality visualizations that showcase the Natural Titanium finish beautifully.

  • iPhone 16 Pro Natural Titanium 3D Model: Professional Product Visualization Guide

    iPhone 16 Pro Natural Titanium 3D Model: Professional Product Visualization Guide

    Introduction to iPhone 16 Pro Natural Titanium 3D Models

    The iPhone 16 Pro and iPhone 16 Pro Max in Natural Titanium finish represent Apple’s premium smartphone design. For 3D artists, product designers, and marketing professionals, high-quality 3D models of these devices are essential tools for creating compelling visual content.

    Why Choose Natural Titanium Finish?

    The Natural Titanium finish on the iPhone 16 Pro offers a sophisticated, premium appearance that stands out in product visualizations:

    • Premium Aesthetic: The titanium finish provides a unique, high-end look
    • Versatile Design: Works well in both professional and creative contexts
    • Realistic Materials: PBR materials accurately represent the titanium surface
    • Commercial Appeal: Perfect for luxury brand marketing and high-end product showcases

    Technical Specifications

    Our iPhone 16 Pro Natural Titanium 3D models feature:

    • High Detail Geometry: 88.2k triangles and 46.1k vertices for realistic detail
    • PBR Materials: Physically Based Rendering workflow with metallic-roughness setup
    • 4K Textures: High-resolution textures for close-up renders and professional presentations
    • Accurate Dimensions: Based on real-world measurements for precise product representation
    • Clean Topology: Optimized geometry with subdivision surface support

    Available Formats

    The iPhone 16 Pro Natural Titanium models are available in multiple formats:

    • FBX: Universal format compatible with most 3D software
    • OBJ: Widely supported format for 3D applications
    • Cinema 4D (C4D): Native format for Cinema 4D S24 users
    • 3ds Max: For Autodesk 3ds Max workflows
    • Blender: Compatible with Blender for free 3D creation

    Professional Use Cases

    Product Visualization

    Create stunning product renders for e-commerce platforms, product catalogs, and marketing materials. The high-detail models ensure your iPhone 16 Pro visualizations look professional and accurate.

    Close-Up Renders

    The detailed geometry and 4K textures make these models perfect for close-up shots that showcase the Natural Titanium finish and design details.

    Advertising Campaigns

    Use the 3D models in print ads, digital campaigns, and social media content. The Natural Titanium finish adds a premium touch to any marketing material.

    Commercial Presentations

    Perfect for client presentations, pitch decks, and product showcases. The professional quality ensures your presentations stand out.

    Material and Texture Details

    The iPhone 16 Pro Natural Titanium models include:

    • Metallic-Roughness Workflow: Industry-standard PBR material setup
    • 4K Texture Maps: Albedo, Normal, Roughness, and Metallic maps included
    • Realistic Reflections: Properly configured materials for accurate surface reflections
    • Subdivision Surface Ready: Models support additional smoothing for ultra-close shots

    Software Compatibility

    These models work seamlessly with major 3D software:

    • Cinema 4D S24: Created and tested in Cinema 4D with Redshift preview
    • Blender: Full compatibility with Principled BSDF shader
    • 3ds Max: Works with Physical Material and Standard Material
    • Maya: Compatible via FBX import
    • Unreal Engine: Can be imported for real-time visualization
    • Unity: Suitable for game development and real-time applications

    Rendering Tips

    Lighting Setup

    For best results with the Natural Titanium finish:

    • Use soft, diffused lighting to showcase the titanium surface
    • Add rim lighting to highlight the edges and premium finish
    • Consider HDRI environment maps for realistic reflections

    Camera Angles

    Showcase the iPhone 16 Pro effectively:

    • Front and back views to show the complete design
    • Side profiles to highlight the titanium frame
    • Detail shots of the camera module and buttons
    • Isometric views for technical presentations

    Getting Started

    Ready to use iPhone 16 Pro Natural Titanium 3D models in your projects? Visit our iPhone 16 Pro 3D Model page to view the live Sketchfab preview and access download options.

    Browse our complete collection of 3D models or check out our products on 3D Ocean.

    Conclusion

    The iPhone 16 Pro Natural Titanium 3D models provide everything you need for professional product visualization and marketing. With high-detail geometry, PBR materials, and 4K textures, these models deliver the quality and realism required for commercial projects and creative endeavors.

  • Best Practices for Using iPhone 17 Pro 3D Models in Cinema 4D and Blender

    Best Practices for Using iPhone 17 Pro 3D Models in Cinema 4D and Blender

    Getting Started with iPhone 17 Pro 3D Models

    Working with high-quality 3D models of the iPhone 17 Pro and Pro Max requires understanding best practices for lighting, materials, and rendering. This guide covers essential techniques for achieving professional results in Cinema 4D and Blender.

    Importing Models into Cinema 4D

    Step 1: Import the Model

    When importing iPhone 17 Pro 3D models into Cinema 4D:

    • Use File → Open or Import to load the C4D file
    • Ensure all textures and materials are properly linked
    • Check that the model scale matches your scene setup

    Step 2: Material Setup

    The iPhone 17 Pro models come with PBR materials. In Cinema 4D:

    • Use the Standard material or Physical material for realistic results
    • Apply the included 4K textures to appropriate channels
    • Adjust reflection and roughness values based on the color variant (Cosmic Orange, Silver, or Deep Blue)

    Working with Blender

    Import Process

    For Blender users importing iPhone 17 Pro models:

    • Use File → Import → FBX or OBJ depending on your file format
    • Set the scale factor appropriately (usually 0.01 for metric units)
    • Enable “Import Materials” to preserve material assignments

    Material and Shader Setup

    In Blender, use the Principled BSDF shader for best results:

    • Load 4K textures into the Base Color, Metallic, and Roughness inputs
    • Adjust the Metallic value based on the iPhone finish
    • Use the Roughness map to control surface reflections

    Lighting Techniques

    Studio Lighting Setup

    For product visualization, use a three-point lighting setup:

    • Key Light: Main light source, positioned at 45 degrees from the camera
    • Fill Light: Softer light on the opposite side to reduce harsh shadows
    • Rim Light: Backlight to separate the iPhone from the background

    HDRI Environment Lighting

    For realistic reflections and ambient lighting:

    • Use HDRI environment maps for natural lighting
    • Adjust the HDRI rotation to control reflection highlights
    • Combine with area lights for additional control

    Camera and Composition

    Camera Settings

    For professional product shots:

    • Use a focal length between 50-85mm for natural perspective
    • Enable depth of field for selective focus
    • Position the camera at eye level or slightly above

    Composition Tips

    • Follow the rule of thirds for balanced compositions
    • Use negative space to emphasize the iPhone
    • Consider multiple angles: front, back, side, and detail shots

    Rendering Settings

    Cinema 4D Rendering

    For Cinema 4D users:

    • Use Physical Renderer or Redshift for best quality
    • Set samples to 128-256 for production renders
    • Enable Global Illumination for realistic lighting
    • Use denoising for cleaner results at lower sample counts

    Blender Rendering

    For Blender users:

    • Use Cycles or Eevee render engine
    • Set samples to 256-512 for final renders
    • Enable Denoising in the Render Properties
    • Use Filmic color management for realistic colors

    Post-Processing Tips

    After rendering, enhance your images:

    • Adjust contrast and brightness in post-production
    • Add subtle color grading to match your brand
    • Sharpen details while avoiding over-processing
    • Consider adding subtle lens effects for realism

    Color Variants Showcase

    The iPhone 17 Pro models are available in three stunning color variants:

    • Cosmic Orange: Vibrant and eye-catching, perfect for bold marketing campaigns
    • Silver: Classic and elegant, ideal for professional presentations
    • Deep Blue: Modern and sophisticated, great for tech-focused content

    Resources and Support

    Need help with your iPhone 17 Pro 3D model project? Check out our detailed product page for specifications and download information.

    For more 3D models and resources, visit our 3D Models collection or browse our products on 3D Ocean.

    Conclusion

    Mastering the use of iPhone 17 Pro 3D models in Cinema 4D and Blender opens up endless possibilities for product visualization and marketing. By following these best practices for lighting, materials, and rendering, you can create stunning visuals that showcase the iPhone 17 Pro in its best light.

  • iPhone 17 Pro 3D Model: Complete Guide for Product Visualization and Marketing

    iPhone 17 Pro 3D Model: Complete Guide for Product Visualization and Marketing

    Introduction to iPhone 17 Pro 3D Models

    The iPhone 17 Pro and iPhone 17 Pro Max represent Apple’s latest flagship smartphones, featuring cutting-edge design and advanced technology. For designers, marketers, and 3D artists, having access to high-quality 3D models of these devices is essential for creating professional product visualizations, marketing materials, and commercial presentations.

    Why Use iPhone 17 Pro 3D Models?

    Professional 3D models of the iPhone 17 Pro offer numerous advantages for creative professionals:

    • Accurate Product Representation: High-detail 3D models accurately represent the real-world dimensions and design of the iPhone 17 Pro and Pro Max
    • Multiple Color Variants: Available in Cosmic Orange, Silver, and Deep Blue finishes
    • Professional Quality: Optimized for close-up renders and product visualization
    • Commercial Use: Licensed for use in advertising, marketing materials, and commercial projects

    Available Formats and Compatibility

    The iPhone 17 Pro 3D model collection includes files in multiple formats to ensure compatibility with your preferred 3D software:

    • Cinema 4D (C4D): Native format for Cinema 4D users
    • Blender: Compatible with the free, open-source 3D software
    • 3ds Max: For Autodesk 3ds Max users
    • FBX: Universal format compatible with most 3D software
    • OBJ: Widely supported format for 3D modeling applications

    Use Cases for iPhone 17 Pro 3D Models

    Product Visualization

    Create stunning product renders for e-commerce websites, catalogs, and marketing materials. The high-detail models ensure your iPhone 17 Pro visualizations look professional and realistic.

    Marketing Campaigns

    Use the 3D models in advertising campaigns, social media content, and promotional materials. The multiple color variants allow you to showcase different options to potential customers.

    3D Rendering Projects

    Perfect for architectural visualizations, product showcases, and creative projects. The models are optimized for both real-time and offline rendering.

    Technical Specifications

    The iPhone 17 Pro 3D models are crafted with attention to detail:

    • High-detail geometry optimized for professional use
    • 4K textures included for maximum quality
    • PBR (Physically Based Rendering) materials where applicable
    • Clean topology for easy modification and customization

    How to Get Started

    Ready to enhance your projects with professional iPhone 17 Pro 3D models? Visit our iPhone 17 Pro 3D Model page to view the live preview and download options.

    You can also browse all our 3D models on 3D Ocean or check out our complete 3D Models collection.

    Conclusion

    Whether you’re creating product visualizations, marketing materials, or 3D rendering projects, high-quality iPhone 17 Pro 3D models are an essential resource. With multiple formats, color variants, and professional-grade quality, these models provide everything you need to bring your creative vision to life.

  • How to Review and Manage Flagged Orders with WooCommerce Order Integrity Checker

    How to Review and Manage Flagged Orders with WooCommerce Order Integrity Checker

    Introduction

    WooCommerce Order Integrity Checker flags orders that may require your attention based on various integrity checks. Learning how to efficiently review and manage these flagged orders is essential for maintaining order quality and making informed decisions. This guide will walk you through the complete workflow for reviewing and managing flagged orders.

    Where to Find Flagged Orders

    1. Orders List View

    The quickest way to see flagged orders:

    1. Navigate to WooCommerce → Orders
    2. Look for the “Integrity” column
    3. Orders show badges:
      • OK (green): No issues detected
      • Warning (yellow): Some issues found, review recommended
      • Critical (red): Important issues detected, immediate review recommended
    4. Click on any badge to jump directly to that order’s edit page

    2. Order Integrity Dashboard

    For an overview of all flagged orders:

    1. Go to WooCommerce → Order Integrity → Dashboard
    2. View summary statistics:
      • Total orders checked
      • Warnings in the last 7 days
      • Critical issues in the last 7 days
      • Orders marked as reviewed
    3. Scroll down to see recent flagged orders in a table
    4. Click any order ID to open the order edit page

    3. Individual Order Edit Page

    When editing any order:

    1. Open the order (WooCommerce → Orders → click on an order)
    2. Scroll down to find the “Integrity Checks” meta box
    3. View all detected issues with severity indicators

    Understanding Integrity Check Results

    Check Types

    Each check shows:

    • Rule Code: The type of check (e.g., DUP_EMAIL, HIGH_QTY, HIGH_VALUE)
    • Severity: Warning (yellow) or Critical (red)
    • Message: Description of what was detected
    • Details: Additional context (if available)

    Common Check Types

    • DUP_EMAIL: Same email used in multiple previous orders
    • DUP_PHONE: Same phone number used in multiple previous orders
    • HIGH_QTY: Order quantity exceeds configured threshold
    • HIGH_VALUE: Order total exceeds configured threshold
    • ADDRESS_MISMATCH: Potential billing/shipping address inconsistency
    • NOTE_KEYWORDS: Suspicious keywords found in customer notes

    Review Process Workflow

    Step 1: Open the Flagged Order

    1. Click on the integrity badge in the orders list, or
    2. Navigate to the order from the Integrity Dashboard, or
    3. Open the order directly and scroll to the Integrity Checks meta box

    Step 2: Review Each Check

    For each flagged check:

    1. Read the Message: Understand what was detected
    2. Check Order Details: Review customer information, order items, and totals
    3. Investigate Context:
      • Is this a repeat customer? (DUP_EMAIL/DUP_PHONE might be normal)
      • Is this a B2B order? (HIGH_QTY might be legitimate)
      • Are products high-value? (HIGH_VALUE might be expected)
      • Does the address make sense? (Check for typos vs. real mismatches)

    Step 3: Make a Decision

    For each order, decide:

    • Legitimate Order: Everything looks fine, just unusual patterns
    • Needs Investigation: Something seems off, needs more review
    • Requires Action: Contact customer, hold order, or take other action

    Managing Flagged Orders

    Mark as Reviewed

    After reviewing an order and determining it’s legitimate:

    1. In the order edit page, find the “Integrity Checks” meta box
    2. Click the “Mark as Reviewed” button
    3. The order will be marked as reviewed (you won’t see alerts for it again unless rechecked)
    4. The badge in the orders list will update to reflect reviewed status

    Note: Marking as reviewed does NOT change the order status. It only flags that you’ve reviewed the integrity warnings.

    Add to Allowlist

    If you frequently see false positives from the same customer:

    1. In the order edit page, find the “Integrity Checks” meta box
    2. Click “Add to Allowlist” button
    3. Choose what to allowlist:
      • Customer email address
      • Customer phone number
      • Both
    4. The customer’s future orders won’t trigger warnings for the allowlisted items

    Note: You can also manually add entries to the allowlist in Settings.

    Recheck Order

    To run integrity checks again on an order:

    1. In the order edit page, find the “Integrity Checks” meta box
    2. Click “Recheck” button
    3. Fresh integrity checks will run with current settings
    4. Results will update if settings have changed or new data is available

    Use this if you’ve updated thresholds or allowlists and want to re-evaluate existing orders.

    Best Practices for Review

    Prioritize by Severity

    • Start with Critical: Review all critical issues first
    • Then Warnings: Address warnings as time permits
    • Review Regularly: Don’t let flagged orders accumulate

    Establish Review Routines

    • Daily Review: Quick check of critical issues
    • Weekly Review: Comprehensive review of all flagged orders
    • Monthly Analysis: Review patterns and adjust settings if needed

    Document Decisions

    Consider adding internal notes to orders:

    • Why an order was flagged
    • What investigation was done
    • Why it was marked as reviewed or what action was taken

    This helps with future reviews and team collaboration.

    Using the Dashboard Effectively

    Dashboard Features

    The Order Integrity Dashboard provides:

    • Quick Stats: At-a-glance view of integrity status
    • Recent Flagged Orders: Latest orders that need attention
    • Filter Options: Filter by severity, date range, etc.

    Dashboard Workflow

    1. Check the dashboard daily for new flagged orders
    2. Review summary statistics for trends
    3. Click on flagged orders to review them
    4. Use filters to focus on specific types of issues

    Working with Multiple Flagged Orders

    Bulk Review Process

    When dealing with many flagged orders:

    1. Start with the Integrity Dashboard to see all flagged orders
    2. Sort by severity (Critical first)
    3. Sort by date (newest first) to prioritize recent orders
    4. Work through the list systematically
    5. Mark orders as reviewed as you complete each one

    Pattern Recognition

    As you review orders, look for patterns:

    • Do certain products trigger more warnings?
    • Are specific customer types (B2B, wholesale) causing false positives?
    • Are there seasonal patterns in flagged orders?

    Use these insights to adjust settings and improve the system.

    Troubleshooting

    Too Many False Positives?

    • Review and adjust thresholds in Settings
    • Add legitimate patterns to allowlist
    • Consider product-specific or customer role-specific thresholds

    Missing Important Orders?

    • Review threshold settings – might be too high
    • Check that all checks are enabled in Settings
    • Verify that checks are running (check Integrity Log)

    Review Process Taking Too Long?

    • Focus on Critical issues first
    • Use allowlist for repeat legitimate customers
    • Adjust thresholds to reduce false positives
    • Consider reviewing in batches rather than individually

    Important Reminders

    • Warning-Only System: This plugin never blocks or cancels orders automatically
    • You Make Decisions: All decisions about orders remain with you
    • Marking as Reviewed: Only indicates you’ve reviewed warnings, doesn’t change order status
    • Regular Review: Make reviewing flagged orders part of your regular workflow

    Conclusion

    Effectively reviewing and managing flagged orders helps you maintain order quality and catch potential issues early. By following a systematic review process, using the dashboard effectively, and adjusting settings based on your findings, you’ll get maximum value from WooCommerce Order Integrity Checker while minimizing false positives and review time.

  • How to Export and Analyze Integrity Log Data from WooCommerce Order Integrity Checker

    How to Export and Analyze Integrity Log Data from WooCommerce Order Integrity Checker

    Introduction

    WooCommerce Order Integrity Checker maintains a detailed log of all integrity checks performed on your orders. Exporting and analyzing this data can help you identify patterns, improve your store’s data quality, and make informed decisions about order management. This guide will show you how to export log data and analyze it effectively.

    Accessing the Integrity Log

    To access the integrity log:

    1. Navigate to WooCommerce → Order Integrity → Integrity Log in your WordPress admin
    2. You’ll see a table listing all integrity check events
    3. Each entry shows: date, order ID, severity level, rule code, and message

    Exporting Log Data

    Method 1: CSV Export via Admin Interface

    The easiest way to export log data:

    1. Go to WooCommerce → Order Integrity → Integrity Log
    2. Use the filter options to narrow down the data you want (optional):
      • Filter by severity (Warning, Critical)
      • Filter by rule code (DUP_EMAIL, HIGH_QTY, etc.)
      • Search by order ID or customer email
    3. Click the “Export CSV” button
    4. The CSV file will download to your computer

    Understanding the CSV Structure

    The exported CSV contains the following columns:

    • Date: When the check was performed
    • Order ID: The WooCommerce order ID
    • Severity: Warning or Critical
    • Rule Code: The integrity check that triggered (e.g., DUP_EMAIL, HIGH_QTY)
    • Message: Description of the issue detected
    • Analyzing Exported Data in Excel/Google Sheets

      Step 1: Open the CSV File

      1. Open the exported CSV file in Excel, Google Sheets, or another spreadsheet application
      2. Ensure data is properly formatted in columns

      Step 2: Create Summary Statistics

      Use pivot tables or formulas to analyze patterns:

      Count Issues by Type

      Create a pivot table to count occurrences of each rule code:

      • Rows: Rule Code
      • Values: Count of Order ID

      This shows which integrity checks trigger most frequently.

      Count Issues by Severity

      Another pivot table:

      • Rows: Severity
      • Values: Count of Order ID

      This shows how many warnings vs. critical issues you have.

      Time-Based Analysis

      Group by date to identify trends:

      • Rows: Date (grouped by week or month)
      • Values: Count of Order ID

      This helps identify if issues are increasing or decreasing over time.

      Step 3: Identify Problem Patterns

      Look for:

      • Most Common Issues: Which rule codes appear most frequently
      • High-Value Orders: Cross-reference with order totals to see if high-value orders have more issues
      • Repeat Customers: Check if the same email/phone appears multiple times
      • Time Patterns: Do issues spike at certain times of day or days of the week?

      Advanced Analysis Techniques

      Combining with Order Data

      For deeper insights, combine integrity log data with order data:

      1. Export your WooCommerce orders (WooCommerce → Orders → Export)
      2. Use VLOOKUP or INDEX/MATCH to join data by Order ID
      3. Analyze:
        • Which product categories have more integrity issues
        • Correlation between order value and integrity warnings
        • Geographic patterns (if order data includes location)

      Creating Visualizations

      Visual representations help identify patterns quickly:

      • Bar Chart: Show frequency of each rule code
      • Line Chart: Show trends over time
      • Pie Chart: Show distribution of severity levels
      • Heatmap: Show issues by day of week and hour of day

      Interpreting Results

      High Frequency of DUP_EMAIL

      If duplicate email checks trigger frequently:

      • This might indicate repeat legitimate customers (consider allowlisting)
      • Could suggest customers sharing accounts
      • May indicate potential issues that need investigation

      Action: Review individual cases and consider adjusting thresholds or adding to allowlist.

      High Frequency of HIGH_QTY

      If high quantity warnings are common:

      • B2B customers may legitimately order large quantities
      • Wholesale orders might need different thresholds
      • Could indicate bulk purchases during promotions

      Action: Consider product-specific thresholds or customer role-based thresholds.

      High Frequency of HIGH_VALUE

      If high value warnings are frequent:

      • Luxury products naturally have higher order values
      • Bulk orders combine to create high totals
      • Gift purchases might exceed normal thresholds

      Action: Adjust value thresholds based on your product catalog and average order value.

      Taking Action Based on Analysis

      Adjust Settings

      Based on your analysis, you might need to:

      • Update thresholds in Settings (duplicate count, quantity, value)
      • Add legitimate patterns to the allowlist
      • Adjust keyword lists for note-based checks

      Improve Store Processes

      Analysis might reveal:

      • Need for better customer account management
      • Opportunities to improve address collection
      • Areas where order review processes can be improved

      Regular Analysis Schedule

      Establish a routine for analyzing integrity log data:

      • Weekly: Quick review of recent warnings and critical issues
      • Monthly: Comprehensive analysis with full export and statistics
      • Quarterly: Deep dive analysis to identify long-term trends and adjust settings

      Best Practices

      • Export Regularly: Don’t wait until you have a problem to export data
      • Keep Historical Data: Archive exports for long-term trend analysis
      • Document Findings: Keep notes on patterns you discover and actions taken
      • Share Insights: Discuss findings with your team to improve processes
      • Review Settings: Regularly review and adjust settings based on data

      Privacy and Data Handling

      Remember:

      • Integrity log data may contain customer information
      • Handle exported data securely and in compliance with privacy regulations
      • Delete exported files when no longer needed
      • Don’t share log data publicly or with unauthorized parties

      Conclusion

      Exporting and analyzing integrity log data provides valuable insights into your store’s order patterns and data quality. Regular analysis helps you fine-tune settings, identify legitimate patterns for allowlisting, and improve overall order management processes. Use the export feature regularly and make data-driven decisions to optimize your store’s integrity checking system.